This page aims at showing you how to use the PDF Printer and there are several steps for you to follow.
Step1. Download and install
Step2. Print document to PDF Printer
Step3. Set parameters
Step4. Print PDF |
 Step1. Download and install Step1. Download and install |
|
For using PDF Printer, the first thing you need to do is to download the application and install it on your computer. Double click the downloaded installer and then follow the installation wizard to fulfill the installation. In the end of the installation, you will be recommended whether to set PDF Printer as the default printer on your computer and you can choose Yes or No according to your needs. |
 Step2. Print document to PDF Printer Step2. Print document to PDF Printer |
To print printable document to PDF file, you need to print the document to PDF Printer at first. There are several ways for your choices:
(1) Open a printable document that you want to print, for example, a Word document. Then Please click File—Print to open Print dialog box and choose current printer as PDFcamp Printer in Printer dropdown list.
(2) Open the document that you want to print and then use shortcut key CTRL+ P to open Print dialog box and then choose PDFcamp Printer as your printer.
(3) If you have set PDF Printer as your default printer and you don't need to set any parameters for created PDF document, you can directly right click the document you want to print and choose Print option in popup floating item.
|
 Step3. Set parameters Step3. Set parameters |
|
After choosing PDFcamp Printer as current printer, please click the button Printer Properties to open a new window in which you can set different parameters for PDF document in different tab. Please see it in Figure 1.
|

|
| Figure 1
|
In Page Setup tab, you can choose PDF page size from the given choices or custom it yourself by inputting width and height. You can also set page margin and page orientation. The resolution and scale rate of PDF graphics can be specified, too.
In Compression tab which is shown in Figure 2, you can choose to compress text and image, including Color, Grayscale and Monochrome image by using different compression methods.
|

|
| Figure 2
|
|
In Doc Info tab shown in Figure 3, you are able to input PDF description including title, subject, author and keywords. You can also choose PDF file format as PDF 1.3, 1.4 or 1.5.
|

|
| Figure 3
|
|
In Save as dialog box shown in Figure 4, you can set the parameters for batch conversion. If you want to make the batch conversion, please check Batch output at first. Then you need to choose the output folder by clicking the button framed by the red rectangle to choose a output location, the path of which will be automatically shown in the text box beside. For better saving output PDF documents, you can choose the options to manage them such as Rename if file exists, Overwrite if file exists, etc. If you want to see output PDF document at the first time after the printing, please check the option View after creation. If you need to email the generated PDF, please check Email after creation option.
|

|
| Figure 4
|
|
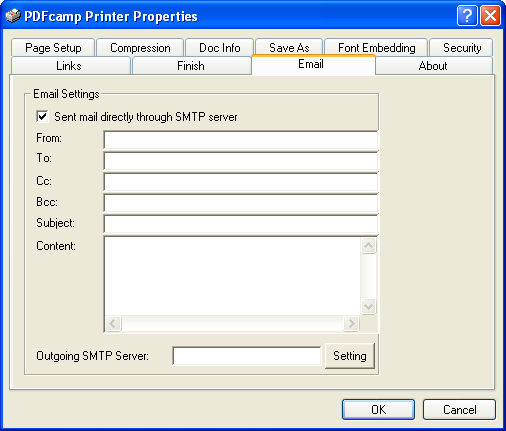
Then you can set the basic parameters for email option in Email tab which is shown in Figure 5. Just check Sent mail directly through SMTP server option and then input the related edit boxes according to your needs. When you click on Setting button, you will be able to input your authentication account name and password in the pop up dialog box.
|
 |
| Figure 5
|
|
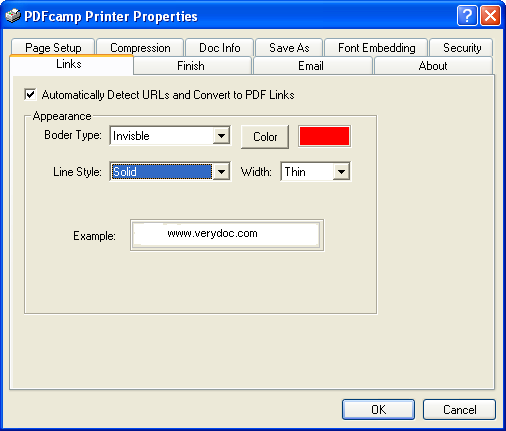
Then please click Links tab which is shown in Figure 6, you can set the link appearance in output PDF document like bolder type, color, line style, etc.
|
 |
| Figure 6
|
|
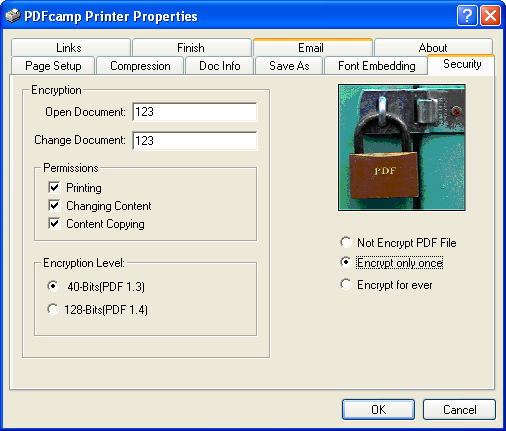
You are also able to set PDF security in Security tab which is shown in Figure 7. For example, you can set open password, owner password, permissions, encryption level, etc. options.
|
 |
| Figure 7
|
|
Then please click OK button.
|
 Step4. Print PDF Step4. Print PDF |
Please click Print button in Print window and then you will see Save as dialog pop up in which you are able to save newly created PDF document.
If you have any questions about PDF Printer, welcome connect us.
|

 Step1. Download and install
 Step2. Print document to PDF Printer
 Step3. Set parameters


 Step4. Print PDF


