HTML to Image Converter

VeryDOC HTML to Image Converter-convert html to image by command line

     VeryDOC HTML to Image Converter  is a modern, unique, simple, powerful, fast and flexible tool to create complex and stylish image document from all kinds of HTML file in your applications with just a few simply command line. This converter can help you get image any HTML document or URL that a modern browser can display, preserving all layout and format in the website executing all the JavaScript scripts found in the HTML document.

System Requirement : Windows 2000 / XP / Server 2003 / Vista / Server 2008 / 7 and Later systems, both 32bit and 64bit systems.

feature Feature List

  • It can generate thumbnail previews of web pages.
  • The output image is like the whole snapshot of the website.
  • It can do the conversion from MHTML to image  and HTML to image in batch.
  • Output image formats:JPG, GIF, PNG, BMP, TIF, EMF, WMF image formats.
  • Option to compress image with good quality.
  • Supports timeout seconds of web page to load.
  •   Supports delayed snapshots of web page.
  • During the conversion, it allows you to hind the DOS Windows.
  • Supports multi-threaded mode, able to capture multiple websites at a time.
  • Option to switches to disable java, activex, scripts on the web page.

how to use How to Use

  • For converting HTML to Image, downloading this converter is requisite step.
  • As this software is command line version, once downloading finishes,  please extract the downloaded zip file.
  • Open extracted folder and check elements in it.
  • Please readme.txt carefully, as it will be helpful to build positive relation with this software.
  • Run the conversion from HTML to Image in compliance with usage and following examples.

Note: not all the VeryDOC software has familiar command line usage, so please read the website instruction and do the conversion according to usage, or else the conversion will fail.

example Examples:

  • Convert HTML of URL address to png. And the website file extension could be HTML, HTM, MHT.
      html2image -url=https://www.verydoc.com/ -out=C:\verydoc.png
      html2image -url=C:\test.htm -out=C:\test.png
      html2image -url=C:\test.mht -out=C:\test.png
  • Convert HTML to Image and specify image quality and size.
      html2image -url=C:\test.mht -out=C:\test.jpg -quality=70
      html2image -url=https://www.verydoc.com -out=C:\out.png -width=100 -height=200 -dpi=200
  • Please use parameter -$ to register this software.
      html2image -$=XXXXXXXXXXXXXX
      html2image -$=XXXXXXXXXXXXXX -url=https://www.verydoc.com -out=C:\test.png

Parameter List:

   -url=<url>:       The URL to capture (http:...|file:...|...)     
  -out=<path>:     The target file (.png|bmp|jpeg|emf|...)        
  -width=<int>:     Width of the output image (default: auto)
  -height=<int>:    Height of the output image (default: auto)
  -xdpi=<int>:       X resolution of the output image (default: auto)
  -ydpi=<int>:       Y resolution of the output image (default: auto)
  -dpi=<int>:         Both X and Y resolution of the output image (default: auto)
  -bwidth=<int>:     Browser width (default: 800)
  -bheight=<int>:   Browser height (default: automatically determined)
  -quality=<int>:    JPEG quality (compression) percent (default: 90)
  -timeout=<ms>:   Timeout in milliseconds (default: 120000, 0 is no timeout)
  -delay=<ms>:       Wait after loading (e.g. for Flash; default: 0)
  -highquality:         Create high quality image files
  -silent:  Whether to surpress some dialogs               
  -help:    Print this help page and exit                  
  -$ :        Input your license key to remove demo watermark

During the converting from HTML to Image, please contact us as soon as possible.
VN:F [1.9.20_1166]
Rating: 0.0/10 (0 votes cast)
VN:F [1.9.20_1166]
Rating: 0 (from 0 votes)
DWG to Vector Converter

DWG to Flash Converter-convert DWG to swf by command line

The best way to share and publish AutoCAD DWG files on the web is that converting DWG to flash and if you need to develop website together with other applications like php, command line version or COM version may be good choice for you. VeryDOC DWG to Vector Converter  has the ability to undertake this task.

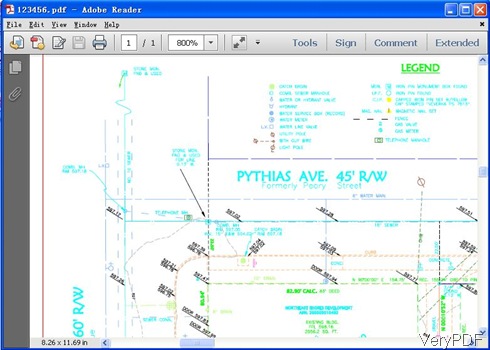
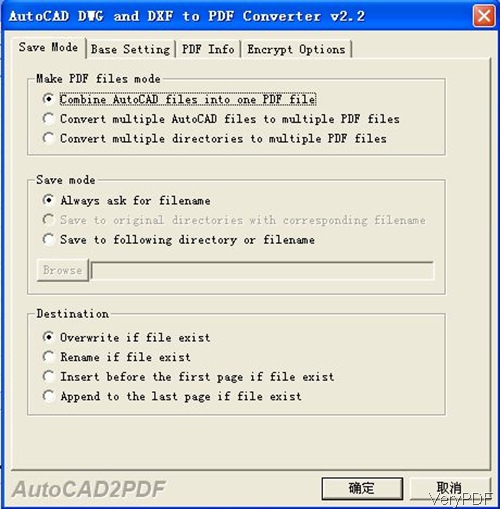
  This converter can be used to convert from AutoCAD DWG and DXF files to other scalable vector graphics formats, such as PDF, EMF, WMF, SVG, Postscript (PS), EPS, SWF (Flash), XPS, HPGL, PCL etc. Converting DWG to flash is just a slice function of it. And by this software, the output swf files are configurable as it allows you to convert DWG file from each view. In the following part, I will show you how to convert DWG to flash by this command line application.

Step 1. Download

  • As it is command line software, after downloading, you do not need to install it. But it has been compressed to zip file format, you need to unzip it.
  • Once the extraction of zip file finishes, folder named verydoc_dwg2vector_cmd will show up.
  • Please open this folder and check elements in it.
  • If you are in the preparation to evaluate and have not made up mind to pay for it, please run the test bat file to check the conversion effect.

Step 2. Run Conversion from DWG to flash

  • Please read readme.txt file first to know related parameters about the conversion. As there is no user brochure for you to refer to, readme.txt is the only source to know the usage of this software.
  • Do the conversion following examples. Here I will list some of them for avoiding inappropriate  missteps.

Usage: dwg2pdf [options] <dwg-file> [<out-file>]
    -dpi <int>         : set DPI to output file
      -colormode <int>   : set color mode, 0 is color and 1 is black and white
   -$ <string>        : input registration key

  • Convert all the DWG file in one folder or directory to flash by wild character.
    dwg2vec.exe C:\*.dwg C:\*.swf
  • Convert DWG file in one folder or directory to flash from each view.
    dwg2vec.exe -byview C:\test.dwg C:\out.swf
    -byview            : create an output file for each view
  • Convert DWG to flash and specify the line width and the unit is in mm.
    dwg2vec.exe -linewidth "1=0.1;2=0.1;3=0.1" C:\test.dwg C:\out.swf
  • -linewidth <string>: set line width, unit in mm

  • Convert DWG to flash and specify the output height and width.
    dwg2vec.exe -width 612 -height 792 C:\test.dwg C:\out.swf
  • -width <int>       : set width, unit is point
    -height <int>      : set height, unit is point

  • Convert DWG to black & width flash or colorful flash. The default will convert what it shows in CAD file.
    dwg2vec.exe –colormode 0 C:\test.dwg C:\out.swf

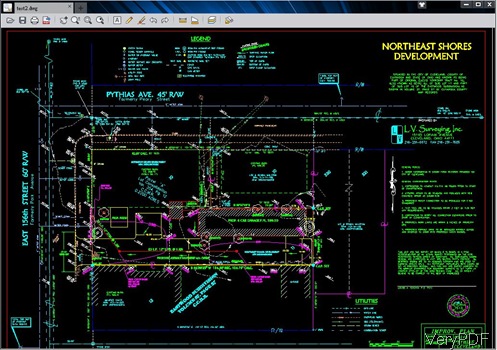
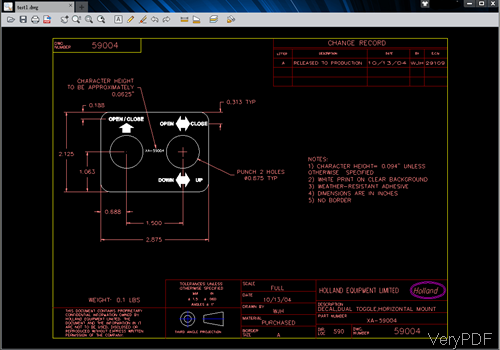
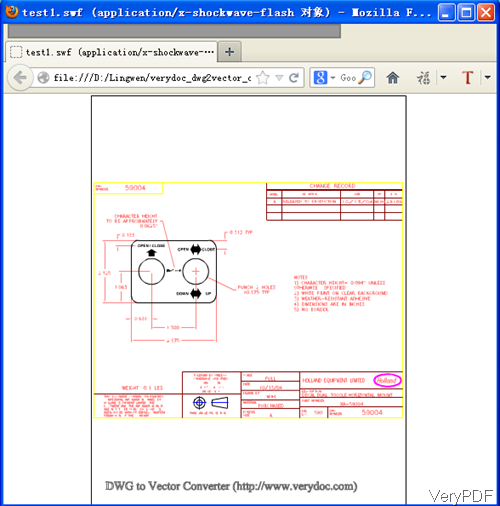
By the above command line, converting DWG to flash will be in a sure-fire way. Now let us check the conversion effect from the following snapshots. During the using, if you have any question, please contact us as soon as possible.
input dwg file

Output Flash

output flash

VN:F [1.9.20_1166]
Rating: 0.0/10 (0 votes cast)
VN:F [1.9.20_1166]
Rating: 0 (from 0 votes)
Batch Photo Resizer

Do you want to batch resize/rename/rotate/sharp/stamp images

If you need a tool to batch resize images/rename/rotate/sharp/stamp images with GUI, this article will be your best guide ever!

What is processing tool?

VeryDOC Batch Photo Resizeris able to help Windows users resize/rename/rotate/sharp/stamp the images in batches. This smart GUI tool supports converting bmp to gif, gif to jpg, tif to png, etc., which also enables you to rotate images with 90 degree, -90 degree or 180 degree one time. Even for blur images, this software helps to sharp images automatically than you expect!

Here is snapshot about software GUI interface:

GUI interface of VeryDOC Batch Photo Resizer

To experience this tool, welcome to download trial VeryDOC Batch Photo Resizerhere.

What does this GUI tool support?

  1. Supported system: All windows systems, include: Windows 2000 and later systems, both 32bit and 64bit systems
  2. Support multiple input image formats: BMP, PCX, GIF, PNG, TIF, JPG, ICO, J2K, etc; support various output images: BMP, PCX, GIF, PNG, TIF, JPG, ICO, J2K, TGA
  3. Support various image conversion, e.g.,  bmp to gif, bmp to jpg, bmp to png, bmp to tga, gif to jpg, gif to png, gif to tga, tif to gif, tif to jpg, tif to png, tif to tga, png to gif, png to jpg, png to png, png to tga, etc.
  4. Fix Image—the images will be resized according to the original proportion referring to the smaller value between width and height
  5. Restrict Width —the width value will be set by the user and the images will be resized retaining the original proportion; Restrict Height—the height value will be set by the user and the images will be resized retaining the original proportion
  6. Manually define the new width and height
  7. Rename images with prefix and continuous numbers in batches
  8. Sharpen blurred photos
  9. Rotate images by 90, –90 or 180
  10. Stamp images with text in specific font flexibly
After general introduction about recommended tool, to use it to resize files of image beyond limited times, as well as other supported operations, please purchase VeryDOC Batch Photo Resizer.
VN:F [1.9.20_1166]
Rating: 0.0/10 (0 votes cast)
VN:F [1.9.20_1166]
Rating: 0 (from 0 votes)
Batch Photo Resizer

How to resize/rename/rotate/stamp images with GUI

You will know how to resize images, rename images and stamp images with GUI in this article, if you are interested in it, just read the followings.

The processing tool is VeryDOC Batch Photo Resizer, which helps to resize/rotate/stamp/rename files of image, e.g., JPG, BMP, GIF, PNG, TIF, TGA, etc.. Through this smaller GUI interface, it is simple and instant to achieve resizing, rotating, stamping, renaming images one time, no matter you add same-type images or various supported formats images. So, if you need this tool right now, and want to follow me to realize setting on your own images, just get trial version VeryDOC Batch Photo Resizer here, and proceed to operate them:

1. Run software and add images

Double-click shortcut so that GUI interface pops out, where you can click Add Images File(s) > select images in pop dialog box > click Open directly to add image files, and then, you can find selected images could be displayed in processing table. For quicker adding, you can drag and drop images into processing form directly.

2. Set supported features on images and edit output format

Unlike other tools, this smaller GUI application provides convenient ways to realize supported features setting:

  • To resize files of image, click check-box Resize > click one of selectable types on pop list Type to regulate resizing type > set width and height accordingly by the way of typing values in edit-boxes Width and Height
  • To rename photos, click check-box Rename > input prefix in edit-box Prefix to set prefix of filename, then, to set beginning number, type number in edit-box Number from
  • For image rotation, please click one of radios 90, –90 and 180 to rotate files of image by 90, –90 or 180
  • To stamp photos, click check-box Stamp > type text as stamp in edit-box Text; to edit text font, just click Font beside this edit-box to edit it

Optionally, to sharp output images, please click check-box Sharper on GUI interface so that it could work as you want during processing. And then, it’s time to set output format of image files, one click on pop list Output Format enables you to set supported image format easily, e.g., BMP, JPG, TIFF, etc.. And for more info, here is snapshot about actions above:

GUI interface after resizing images, rotating images and stamping images

3. Achieve resizing, renaming, rotating and stamping

To get setting above work and set destination folder, one click on Convert helps to realize them: after you set targeting folder in pop dialog box with one click on OK, later on, targeting images with set properties mentioned above, can be added into destination folder.

By now, for any concerns, just leave comments here; for full version software resizing/renaming/rotating/stamping images for good, just buy VeryDOC Batch Photo Resizer.

VN:F [1.9.20_1166]
Rating: 0.0/10 (0 votes cast)
VN:F [1.9.20_1166]
Rating: 0 (from 0 votes)
Batch Photo Resizer

VeryDOC Batch Photo Resizer helps to resize photos

This article aims to introduce you a great GUI tool to help you batch resize photos anytime – VeryDOC Batch Photo Resizer, which supports professionally resizing photos one time on Windows platforms.

For more information about this tool, welcome to visit homepage of VeryDOC Batch Photo Resizer. And in the following paragraphs, you can get steps to batch resize photos with GUI in Windows systems as you expect, if you need:

Step1. Download and install

You need to download installer of VeryDOC Batch Photo Resizer firstly, and then, double-click it to install trial version in your pc by the setup wizard step by step, and finally, trial version software will be located in your computer.

Step2. Run GUI and add photos

Double-click shortcut to open GUI interface, and then, based on your need, software offers you 2 ways to add source photos, which could be one of formats images in the following snapshot:

supported image formats list for batch resizing photos with GUI interface

  • Click Add Image File(s) on GUI interface > select supported photos in pop dialog box > click Open
  • Drag and drop photos into file list

Finally, photos paths, sizes, properties, etc. could be displayed in this file list on GUI interface.

Step3. Set resizing option

After adding photos, besides resizing photos, program provides other ways to edit photos, e.g., renaming, sharp, rotating photos, etc., and the followings tell you how to realize them one by one:

  • To rename photos, please click check-box Rename; to set prefix of filename, please input prefix in edit-box Prefix; to set beginning number, please type number in edit-box Number from
  • To resize photos, click check-box Resize firstly: click on one of selectable types on pop list Type helps to regulate resizing type, and more info could be found at Resizing types for resizing photos with GUI , then, you can set width and height accordingly in edit-boxes Width and Height
  • To make output photos sharper, please click check-box Sharper
  • To rotate images, please click one of radios 90, –90 and 180 to set rotation as 90, –90 or 180
  • To stamp photos, click check-box Stamp > type text as stamp in edit-box Text; to edit text font, just click Font beside this edit-box to edit it

After you operate them respectively, it could be finished to edit resizing options, and it is time to set output image format: click one of formats on pop list Output Format, e.g., JPG, BMP, PNG and other formats at image formats pop list during resizing photos with GUI , and the snapshot below reveals more details about my description above:


GUI interface with added photos and set options for resizing photos

In the end, to make setting effective, just click Convert on GUI interface, and then, after selecting destination folder of saving output photos in pop dialog box with one click on Ok, software starts to batch resize photos, and after a while, your photos could be resized as you expect, as well as other setting you just did.

Finally, to use this software for good within no limited times, please purchase VeryDOC Batch Photo Resizer.

VN:F [1.9.20_1166]
Rating: 0.0/10 (0 votes cast)
VN:F [1.9.20_1166]
Rating: 0 (from 0 votes)