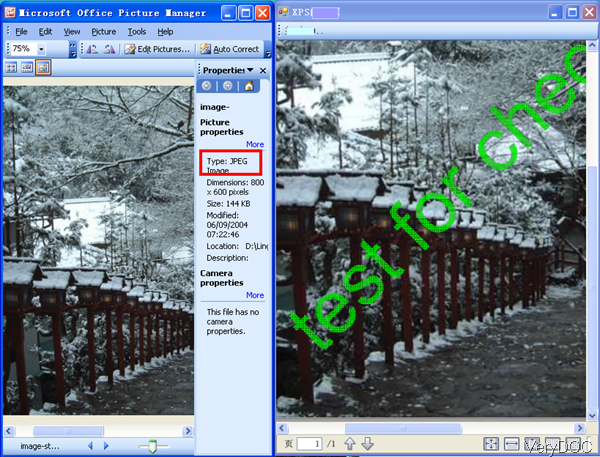
When you need to get the content in Jpeg file format to paper document, it will be a little complicated as now most of the printers does not support image as input printing formats. However, if you can convert Jpeg to XPS file then you can print it directly. VeryDOC Jpeg to XPS Converter can help you do the conversion and it also allows you to stamp watermark on the output XPS file. In the following part, I will show you how to use this software.
Step 1. Download Jpeg to XPS Converter
- This software is Windows command line application, once downloading finishes, there will be an zip file. Please extract it to some folder then you can use it normally.
- If you need to know more functions and usage, please check them on our website.
Step 2. Convert Jpeg to XPS and add watermark
- When you run the conversion, please refer to the usage and examples.
Usage: img2xps.exe [options] [Options] <Image Files> - When you need to convert Jpeg to XPS and add watermark, please refer to the following command line template.
img2xps.exe -wtext "test for checking" -wb -wi -wu -ws C:\input.jpg
When you input the command line, please call this application first in MS Dos Windows, using parameter -wtext to specify the text of watermark, then specify watermark color, size, position and others. At last input the full path of input Jpg file path. - When you need to convert single Jpeg to XPS, please refer to the following command line.
img2xps.exe C:\files.jpg C:\out.xps - When you need to do batch conversion, you can use wild character. Please refer to the following command line.
img2xps.exe C:\*.jpg C:\out.xps
img2xps.exe C:\test*.jpeg C:\*.xps
By this function, you can also convert jpg files with some prefix to XPS file in batch, say C:\test*.jpeg.
Related Parameters:
-wtext <string> : watermark on printed document
-wtype <int> : type of watermark
0 : normal watermark
1 : watermark on header
2 : watermark on footer
-wf <string> : font name of watermark
-wh <int> : font height of watermark
-ww <int> : font width of watermark
-wb : specify bold font
-wi : specify an italic font
-wu : specify an underlined font
-ws : specify a strikeout font
-wo <int> : opacity of watermark, from 0 to 100
-wa <int> : angle of watermark
-wc <string> : color of watermark,
FF0000: Red color
00FF00: Green color
0000FF: Blue color
HexNum: Other colors
-wx <int> : X offset of watermark
-wy <int> : Y offset of watermark
Now let us check the conversion effect from the following snapshot.
During the using, if you have any question, please contact us as soon as possible.
