JPG is short for JPEG, which is a raster image format. A JPG file has many merits, such as the smaller size, and the entire color etc..Also JPG files could be used in many web pages for the good quality and smaller size. However, JPG files could not contain multiple pages in one file, but JPEG format is still very popular around the world. 🙂 This article will show you how to generate the jpg files from PowerPoint files. Moreover, we need to use a converter, which is named “DOC to Any Converter Command Line”. DOC to Any Converter Command Line has been designed to help users get popular formats from the original Office documents file types, such as PowerPoint to png, Word to swf, Excel to eps, and rtf to flash etc.. Also it can help you convert the file types of Office documents for each other, and help you get the targeting files with more specific properties. And next, the following paragraphs will tell you how to convert PowerPoint to jpg with this dreaming tool. 🙂
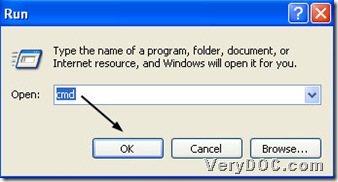
Step1. Launch the running environment----the command prompt window, more details, please refer to the following figures:
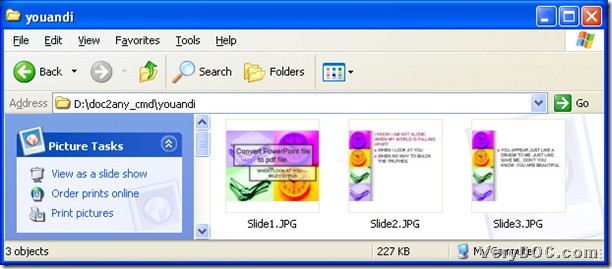
Step2. Launch DOC to Any Converter Command Line, prepare the basic work for the conversion and get the conversion done. First, you could input the path of “doc2any.exe” in the current directory in order to run the converter, or the other way is to drag and drop the program of “doc2any.exe” into the dialog box of “cmd” directly. Then input the path of the source file in order to add the source file, or the easier way is to drag and drop the source file into the dialog box of “cmd.exe” directly, which can give you the same result. Next, to edit the targeting file type and give a space to the objective file, you could input the targeting path, where you could customize the file name and location flexibly, by the way, without GUI interface, I think DOC to Any Converter Command Line could be used more flexibly. And finally, to convert PowerPoint to jpeg, you could click “enter” of keyboard, then in the dialog box of “cmd”, DOC to Any Converter Command Line could help you process the task very quickly. And later, the conversion from PowerPoint to jpeg is successful, and jpg files could be added into a folder, which are named with the slide names of PowerPoint file. If you want to process another task, you could follow the steps above to operate again. 🙂 And here are the figures about the whole conversion and the targeting files below:
And if you want to edit the properties of jpg files, you could refer to the following picture:
Please allow me to introduce the parameters in the picture above:
-useprinter: convert Office files to the targeting files via virtual printer
-width <int>: help you set the width of the targeting file
-height<int>: help you set the height of the targeting file
-bitcount<int>: help you set the color depth of the targeting image
-xres <int>: help you set x resolution of the targeting image
-yres<int>: help you set y resolution of the targeting image
Thank you for reading this article about converting PowerPoint to jpg----PowerPoint to jpeg. 🙂


